
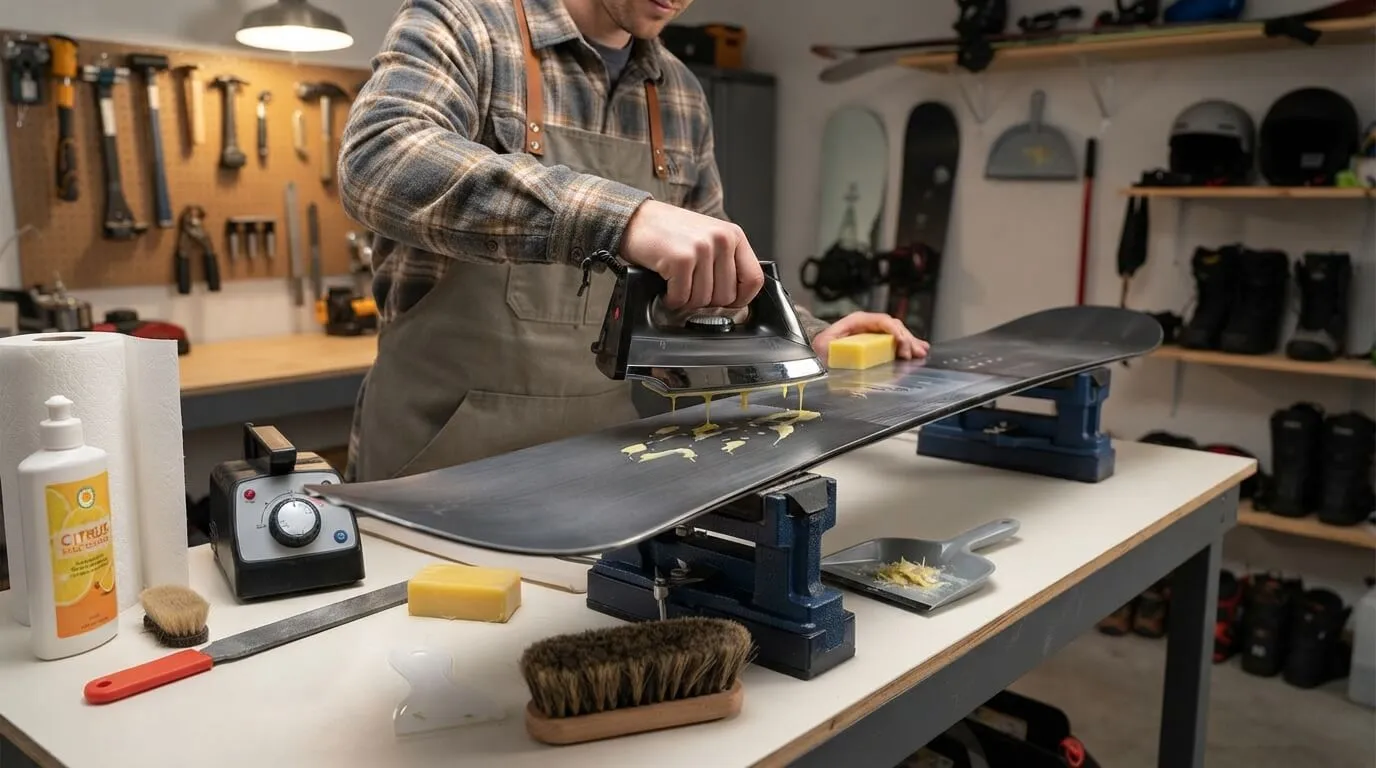
Learning how to wax a snowboard at home is a simple way to care for your gear and enjoy a smoother ride on the mountain. Regular snowboard waxing and maintenance help your board glide well, protect its base, and keep it ready for your next snowboarding trip. You do not need to be an expert to get started. With the right snowboard waxing tools, a suitable iron, wax, scraper, and brush, you can follow a few easy steps at home. This guide explains how to wax a snowboard step by step, choose the right wax, and avoid common mistakes. You will also learn how to inspect your board, care for its edges, handle minor base damage, and store it properly. These practical snowboard maintenance tips will help you keep your gear in good shape season after season.
Quick Answer
To wax a snowboard at home, first clean and inspect the base for dirt or damage. Choose a suitable snowboard wax and set up a stable workspace. Use a waxing iron at the temperature recommended by the wax manufacturer, then spread the wax evenly across the base. Let it cool fully before scraping away excess wax with a plastic scraper. Finish by brushing the base as directed. Regular snowboard waxing and maintenance help improve glide and protect your gear. Always follow product instructions, avoid overheating the base, and seek professional help for deep gouges or serious damage.
Why Should You Wax Your Snowboard?
Snowboard waxing helps your board glide smoothly across the snow and protects its base from drying out. When you ride often, friction and snow conditions can affect how well your snowboard moves. A well-maintained base helps you enjoy a more consistent ride. If the base looks dry, feels rough, or has pale patches, it may need attention. You might also notice that your board feels slower than usual. These signs can mean it is time to consider waxing your snowboard. However, wax cannot fix deep scratches, damaged edges, or other serious problems. Regular snowboard maintenance should also include checking the base, edges, and bindings. With simple care at home, you can keep your board ready for your next snowboarding trip.
What Tools Do You Need to Wax a Snowboard at Home?
Before starting, gather the right snowboard waxing tools so you can work safely and avoid interruptions. You will need suitable snowboard wax, a waxing iron, a plastic scraper, and a brush designed for snowboard bases. A stable work surface or snowboard tuning vise can help hold the board securely. A clean cloth and suitable base cleaner may also be useful, depending on the product instructions. Choose wax that matches the expected snow conditions and your board manufacturer’s advice. Avoid using unsuitable tools that could scratch or damage the base. Keep the iron away from flammable materials and work in a well-ventilated area. Having your snowboard tuning supplies ready makes the process easier, especially if this is your first time waxing a snowboard at home.
How to Prepare Your Snowboard Before Waxing
Good preparation helps snowboard wax work as intended. Start by placing your board on a stable surface with the base facing up. Check the base for dirt, scratches, deep gouges, or exposed core material. If you notice serious damage, arrange a professional repair before waxing. Remove loose dirt with a clean cloth and use a suitable snowboard base cleaner only when recommended by its manufacturer. Let the board dry completely before applying wax. Check the metal edges for rust or damage, but avoid sharpening them unless you have the right tools and knowledge. Make sure the board cannot slide while you work. Proper snowboard base cleaning and inspection help you spot problems early and prepare the surface for waxing. Never use wax to cover damage that needs repair.
How to Choose the Right Snowboard Wax
Choosing the right snowboard wax depends on the snow conditions, temperature range, and product instructions. All-temperature wax is a convenient option for riders who experience changing weather throughout the season. Temperature-specific wax may suit riders who want a product designed for particular snow conditions. Before buying, check the wax label and follow the manufacturer’s guidance. Hot wax is applied with a suitable waxing iron and generally provides more lasting care than many quick rub-on products. Rub-on snowboard wax can be useful when you need a quick and simple option, but results and durability vary. Avoid choosing wax based only on price or color. The right product, careful application, and regular snowboard maintenance all contribute to good base care. Always use wax intended for snowboards.
How to Wax a Snowboard at Home Step by Step
Clean and Inspect the Snowboard Base
Start by checking your board carefully before applying wax. Remove dirt and loose debris with a clean cloth, and follow the instructions for any base cleaner you use. Make sure the base is fully dry before continuing. Look for scratches, gouges, and signs of damage that may need repair. Small surface marks are not always serious, but deep cuts or exposed core material should be checked by a professional. Cleaning the base helps prevent dirt from becoming trapped under the wax. It also gives you a better view of the board’s condition. Proper preparation is an important part of snowboard waxing at home. Once the base is clean, dry, and ready, gather your wax, iron, plastic scraper, and brush so you can work without rushing.
Set Up the Waxing Iron Safely
Use a snowboard waxing iron designed for the job and set its temperature according to the wax manufacturer’s instructions. Different waxes may need different temperatures, so do not guess or rely on a single setting for every product. Place the board on a stable surface and keep the iron away from clothing, plastic items, and other materials that could melt or catch fire. Work in a well-ventilated area. Let the iron reach the recommended temperature before applying wax. Never leave a hot iron in one spot on the snowboard, as too much heat can damage the base. If the wax begins to smoke, lower the temperature and follow the product’s safety guidance. Careful setup makes hot waxing a snowboard safer and helps you avoid common mistakes.
Apply the Snowboard Wax
Once the iron is ready, apply the snowboard wax according to the product instructions. Many hot-waxing methods involve melting small drops of wax onto the base and then moving the iron smoothly across the board. Spread the wax evenly without leaving the iron still in one place. Use enough wax to cover the base, but avoid applying more than necessary. The goal is an even layer, not a thick pool of melted wax. Keep the iron moving and watch the surface carefully. Never allow the wax to smoke or the base to become excessively hot. If you are new to how to wax a snowboard with an iron, take your time and follow the wax manufacturer’s directions. A steady, careful process helps reduce the risk of heat damage.
Let the Wax Cool
After spreading the wax, allow it to cool fully before scraping. The required cooling time depends on the wax product and the conditions in your workspace, so follow the manufacturer’s instructions rather than relying on a fixed time. Cooling allows the wax to settle before you remove the excess. Avoid touching the hot base or trying to speed up the process with unsuitable heat sources or sudden temperature changes. Use this time to put away unused supplies and prepare your plastic scraper and brush. Rushing this step can make finishing harder and may affect the quality of your snowboard waxing job. Once the wax has cooled as directed, check that you are ready to scrape safely. Patience during this stage helps you achieve a cleaner finish.
Scrape Off Excess Wax
When the wax has cooled fully, use a suitable plastic snowboard scraper to remove the extra wax from the base. Work with controlled, even strokes and follow the scraper manufacturer’s guidance. The goal is to remove excess wax rather than leave a thick layer on the surface. Take care around the edges and avoid using sharp tools that could damage the board. Continue until the base looks smooth and no obvious patches of excess wax remain. Do not rush or press so hard that you lose control of the scraper. Learning how to scrape snowboard wax properly is an important part of a good home waxing routine. A clean scrape prepares the base for brushing and helps prevent leftover wax from affecting the board’s feel on snow.
Brush and Finish the Base
After scraping, use a suitable snowboard wax brush to finish the base according to the wax manufacturer’s instructions. Brushing helps remove remaining loose wax and smooth the surface. Use steady strokes and the recommended brush type rather than pressing too hard. Some products may suggest a particular brushing order or additional finishing steps, so check the instructions for your wax. When finished, inspect the base for leftover wax and make sure the board is clean and ready to use. Put away your tools safely, especially the hot iron. A careful finish completes the snowboard waxing process and supports good glide. If the board still feels rough or you notice damage during finishing, check the cause before riding instead of assuming that more wax will solve every problem.
Common Snowboard Waxing Mistakes to Avoid
A few simple mistakes can make snowboard waxing at home harder or even damage your board. One common error is using too much heat. If the wax smokes, follow the product’s safety guidance and lower the temperature. Never leave the iron stationary on the base. Another mistake is scraping before the wax has cooled fully, which can make the finish uneven. Leaving too much wax on the base is also unnecessary; scrape and brush according to the manufacturer’s instructions. Do not apply wax over deep gouges or exposed core material, because these problems may need professional repair. Avoid using sharp or unsuitable tools that can scratch the base. Finally, do not skip cleaning or inspection. Careful preparation and a steady process make snowboard maintenance easier and safer.
How Often Should You Wax Your Snowboard?
How often you should wax a snowboard depends on how much you ride, the snow conditions, and the type of base your board has. Riders who spend many days on the mountain may need to wax more often than those who ride only a few times each season. Dry-looking patches, reduced glide, or a rough-feeling base can be signs that your board needs attention. However, no single schedule works for every snowboarder. Check your board regularly and follow the advice provided by the snowboard and wax manufacturers. How long snowboard wax lasts also depends on the wax, riding conditions, and how the board is used. Instead of waiting until your board feels very slow, make base inspection part of your normal snowboard maintenance routine.
Can You Wax a Snowboard Without an Iron?
Yes, you can use rub-on snowboard wax or another suitable no-iron product if its instructions allow it. These products can be convenient when you are travelling or need a quick option without setting up a waxing workspace. However, they may not last as long as a properly applied hot wax, and performance varies by product and snow conditions. Read the label carefully to understand how to apply the wax and prepare the base. Never substitute household products that are not made for snowboard care. If you ride often, learning how to hot wax a snowboard may be worthwhile because it gives you a more thorough maintenance option. For occasional riders, rub-on wax can be a practical choice between full waxing sessions.
How to Maintain Your Snowboard After Every Ride
Good snowboard care does not end when you leave the mountain. After each ride, wipe moisture and dirt from your board and dry the metal edges to help prevent rust. Check the base for new scratches and look for visible damage around the edges. Inspect your bindings for obvious cracks, worn straps, or loose hardware, and follow the manufacturer’s guidance for any adjustments. Avoid leaving a wet snowboard inside a closed bag or vehicle for long periods. Store it in a dry place between sessions. These simple snowboard maintenance tips can help you spot problems before your next trip. If you find a damaged edge, a deep base gouge, or a binding problem, do not ignore it. Arrange professional inspection when the issue goes beyond routine care.
How to Repair Minor Snowboard Base Damage
Small scratches and deeper gouges need different levels of attention. A light surface mark may not require the same repair as a cut that reaches the board’s core. P-Tex snowboard repair products are used for certain base repairs, but they require suitable tools, careful preparation, and correct use. Before trying a repair, read the product instructions and assess the damage honestly. Do not assume that waxing will fill a gouge or restore a damaged base. If the core is exposed, the edge is damaged, or the board has a large or deep cut, consult a professional snowboard repair shop. Knowing how to repair snowboard base scratches starts with understanding which damage is safe to handle at home. When you are unsure, professional advice is the better choice.
How to Store Your Snowboard During the Off-Season
Before storing your snowboard for summer, clean off dirt and make sure the board is completely dry. Check the base, edges, bindings, and visible hardware for problems that need attention before the next season. Store the board in a cool, dry place away from direct sunlight and extreme heat. Avoid placing heavy items on top of it or leaving it somewhere damp. Some riders apply storage wax to help protect the base during the off-season. If you do this, follow the wax and snowboard manufacturer’s instructions about whether to leave the wax on until the next ride. Proper snowboard summer storage helps keep your equipment in good condition between trips. Before returning to the mountain, inspect the board again and arrange any needed repairs or tuning.
Frequently Asked Question’s
How long does it take to wax a snowboard?
The full process can take around an hour or more, depending on preparation, cooling time, and your experience. Follow the wax manufacturer’s instructions and allow enough time to cool, scrape, and brush the base properly.
How long should snowboard wax cool before scraping?
Cooling time varies by product and conditions. Follow the wax manufacturer’s recommended timing and let the wax cool fully before scraping.
Can you use a regular clothes iron to wax a snowboard?
A clothes iron may not provide the same temperature control as a dedicated waxing iron. A purpose-built iron is the better choice. If a manufacturer permits another iron, follow its specific instructions carefully.
How do you know when a snowboard needs wax?
A dry-looking base, pale patches, or reduced glide may indicate that waxing is needed. Inspect the base regularly, but remember that scratches and gouges may require repair rather than wax.
Is rub-on snowboard wax as effective as hot wax?
Rub-on wax is convenient, but it often does not last as long as a properly applied hot wax. Results depend on the product, snow conditions, and how frequently you ride.
Should you wax a new snowboard?
Check the snowboard manufacturer’s guidance. Some new boards come factory-waxed, while others may benefit from additional preparation before riding. Follow the product instructions for your particular board.
Final Snowboard Waxing Checklist
Before your next session, make sure your snowboard maintenance routine covers the basics. Check the base for dirt and damage, gather the correct wax and tools, and follow the manufacturer’s instructions throughout the waxing process. Keep the iron moving, allow the wax to cool fully, and scrape and brush away excess wax carefully. After riding, dry the board and inspect the edges and bindings. Repair small issues only when you have the right tools and knowledge, and seek professional help for deep gouges, exposed core material, damaged edges, or binding problems. Store the board in a dry place when you are not using it. With regular snowboard waxing and care, you can keep your gear in better condition and be more prepared for your next day on the mountain.